Design and build better and safer access to your home and garden
There are many different ways you can build box steps, and depending on your need, you can choose the complexity and effort for the results that you most desire. As I show you step by step how I built my steps, I’ll also discuss various options I considered during planning and construction.
Depending on the landscape and obstacles to work around, some people will use a small excavator or Bob Cat to do much of the digging and clearing. Or to minimize having to dig, they may opt to make the steps follow the slope and contour of the landscape. These can appear more free-flowing and attractive in the right setting, such as a garden path or trail through hilly landscape. For my steps, I was replacing rotted pine log and gravel steps, so a lot of the site prep was already done. However, I couldn’t use power equipment for clearing and moving dirt because I had to work around French drains, electrical, telephone and cable, and natural gas lines running to the house.

I wished to build steps to run from my driveway up a slope to the back of the house. Since these are on the approach side, they are highly visible. They had to look nice and be uniform in height and depth. I started by taking measurements.
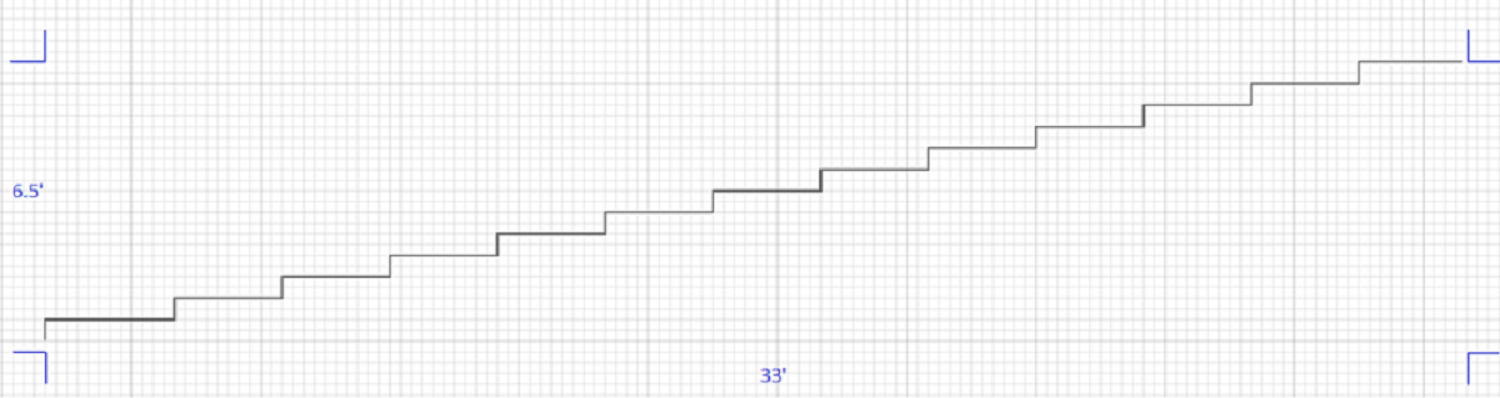
The steps needed to cover a 33 foot run while going up in height 6.5 feet.
To build the boxes, I chose to use 6” x 6” x 8’ treated landscape timbers. Being treated, they are relatively inexpensive compared to cedar or redwood, will hold up to weather and insect infestation, and the dimensions are a true 6” x 6”, making for easier calculations. For an elevation of 6.5’, I needed 13 steps. For the 33’ run, I chose to make the first step a landing step at a depth of 3’, and make each of the remaining 12 steps 2.5’ deep. I also wanted the boxes to be no more than 3’ wide so I could get two 3’ sections and a 2’ section out of each timber.
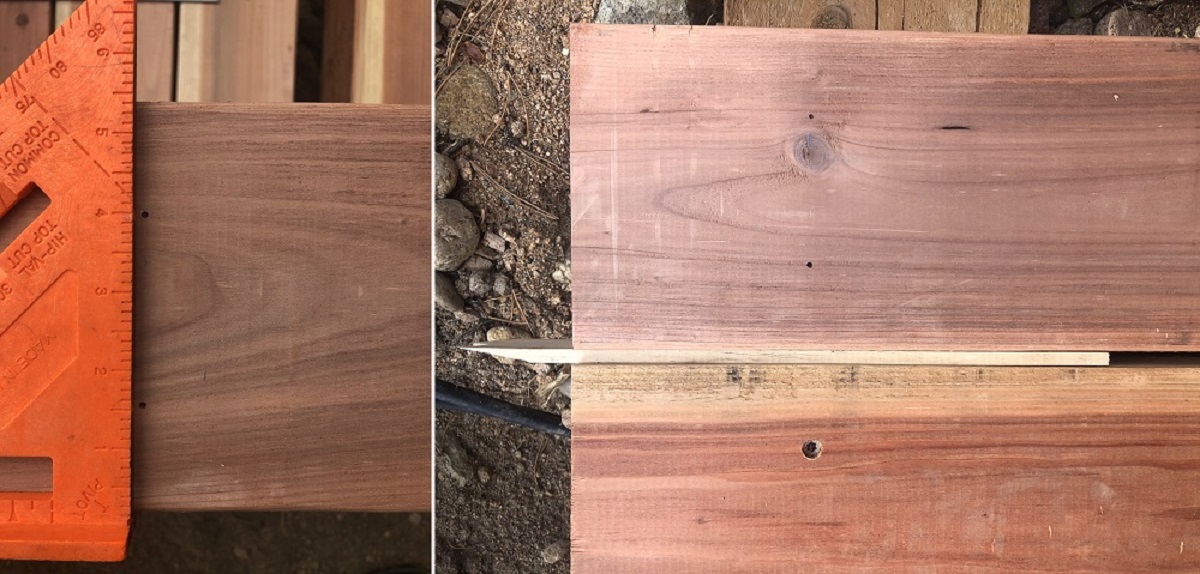
To cut the timbers, I marked the lengths with a speed square and cut them with a 7” circular saw. Because of the size of the timbers, I had to rotate and cut on each side of the timber, and then finish the cut through the middle of the timber with a handsaw. Then I constructed the boxes by bolting the timbers together with 7” lag screws. A 1” spade bit was used to drill and sink the bolt heads, and then I drilled through the timber with a regular bit. I pre-marked all of the drill holes for uniformity.

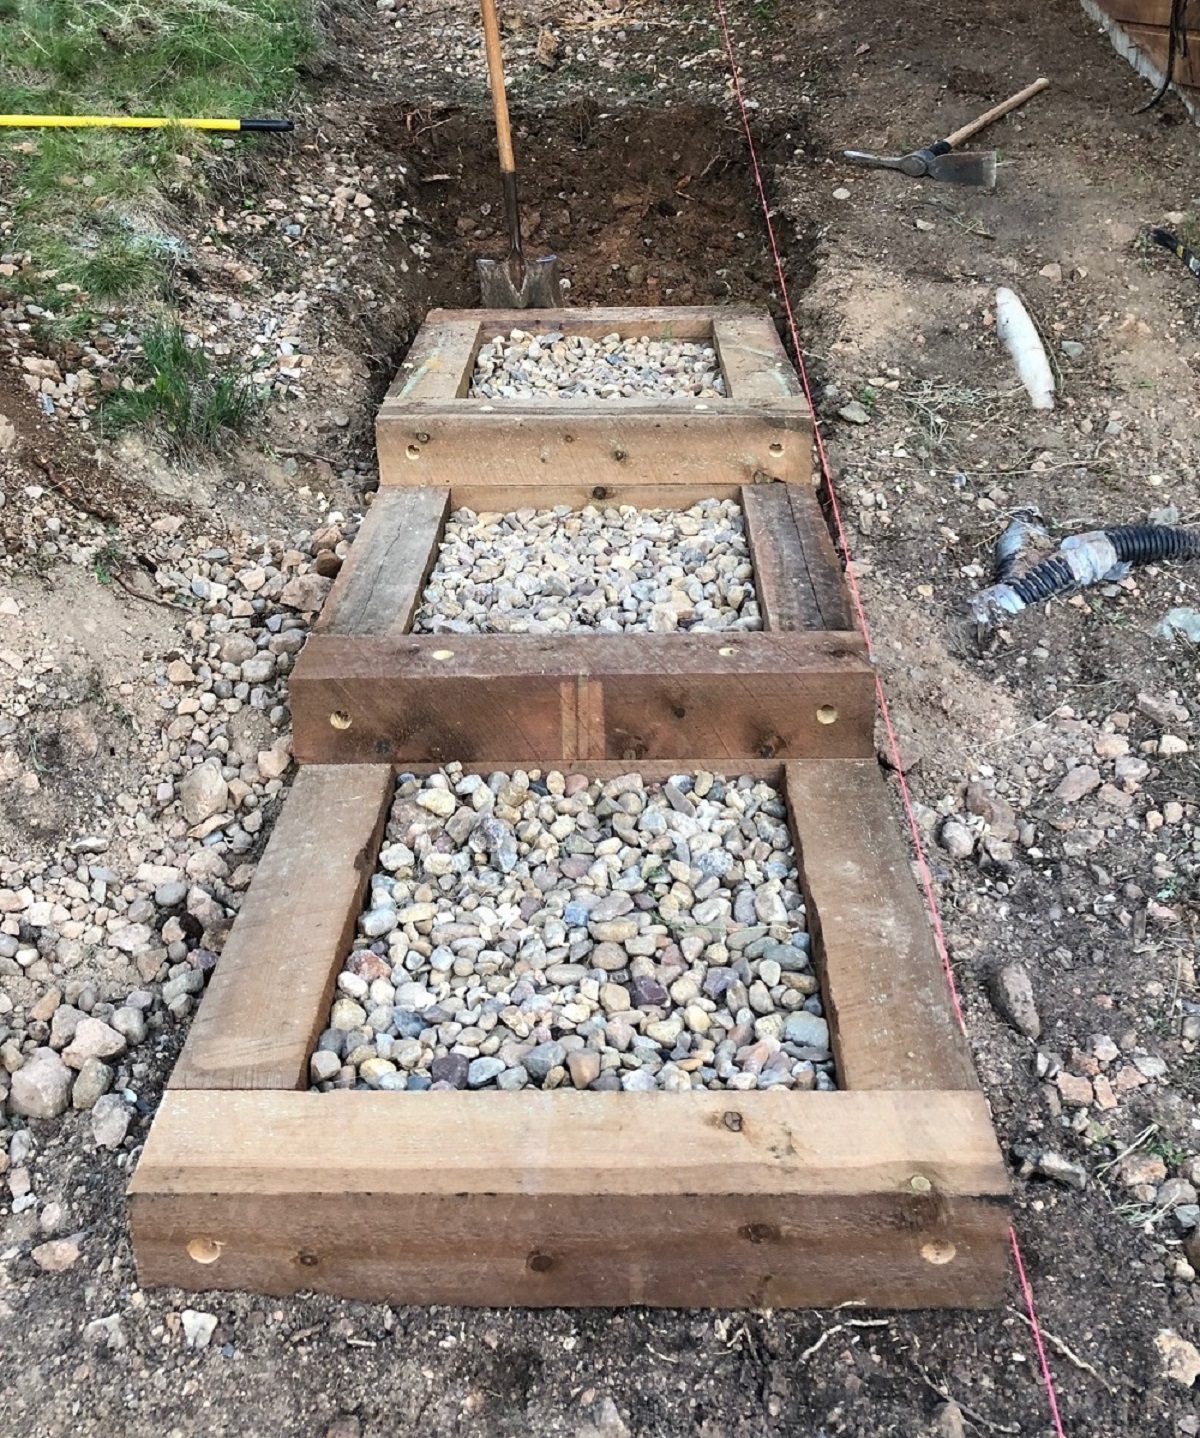
To lay the boxes, I measured and strung a line to ensure they would be straight. Then I placed and leveled each step as I went up the elevation and backfilled each with dirt and rock. I drilled and bolted each new step to the previous step as I went up the slope. Lastly, I drilled down through the side timbers and staked the stairs to the ground with 18” rebar stakes.

To finish the steps, I considered 5/4” rounded edge treated decking and redwood, and chose redwood at the recommendation of the lumber yard to avoid warping issues with treated wood. Because of inconsistencies in the boxes, instead of putting planking on the boxes and then cutting the edges, I pre-cut the planks and aligned them to a centerline on the boxes. I was able to cut all of the planking quickly and precisely by building a jig on my table saw. The jig saved a lot of time!
I measured and pre-marked all of the screw holes for the decking to improve the finished look, and to ensure uniform placement, I used a spacer when positioning each plank. A paint stir happened to be the right thickness.
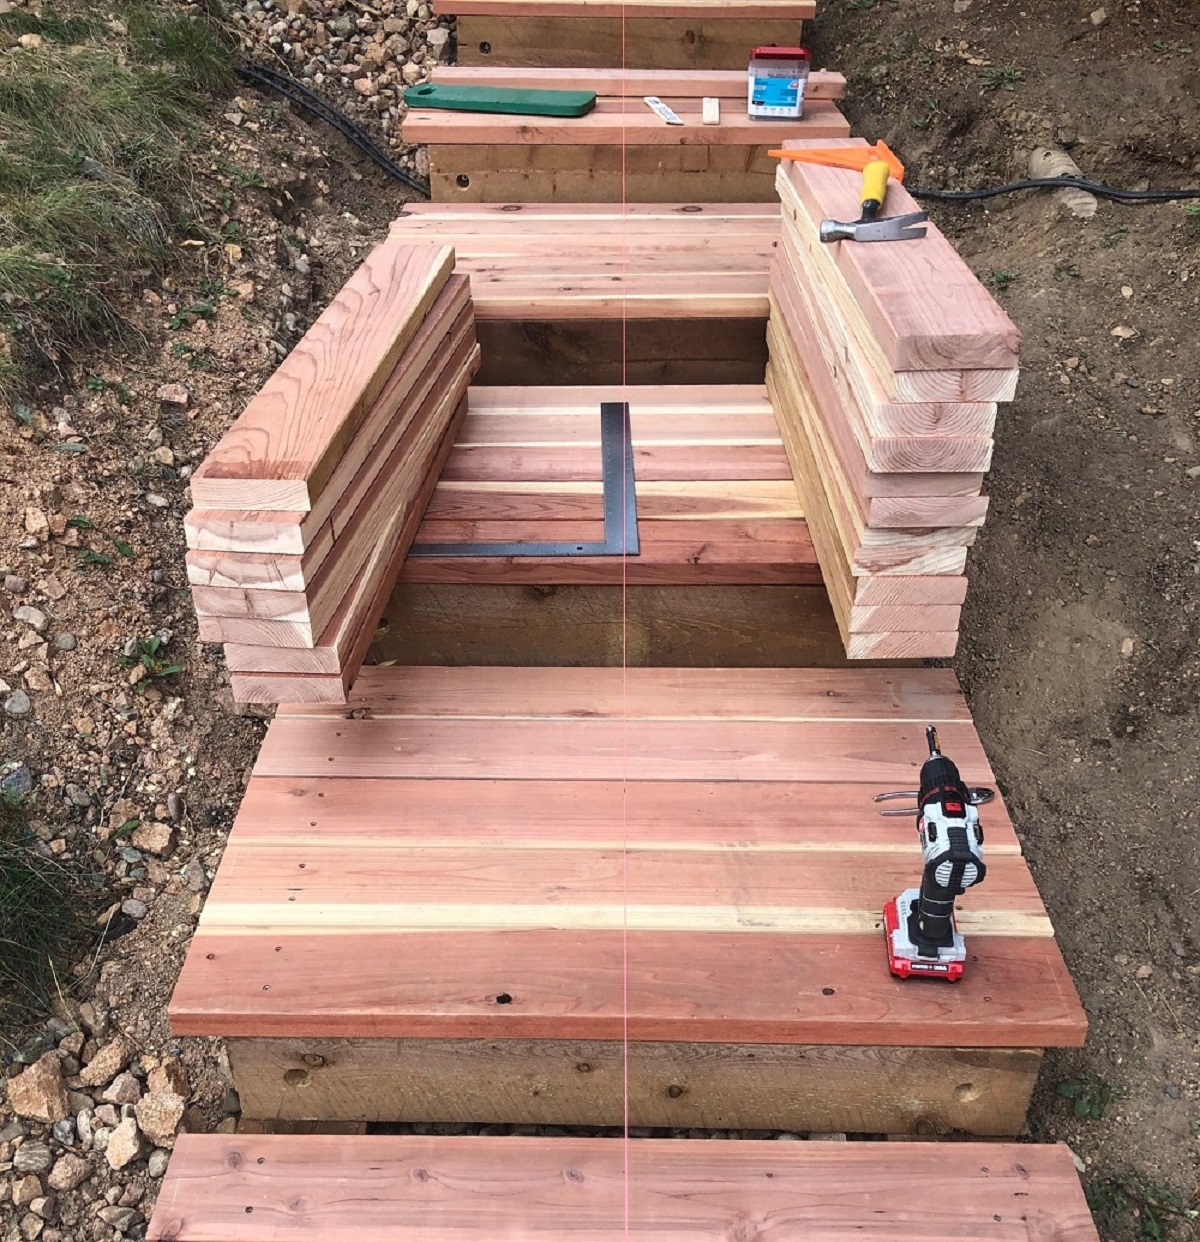
I planked from the front of each step to the back. I considered kick plates and plank overhang on the front but opted to leave the timbers exposed for a more rustic look and to match the house.
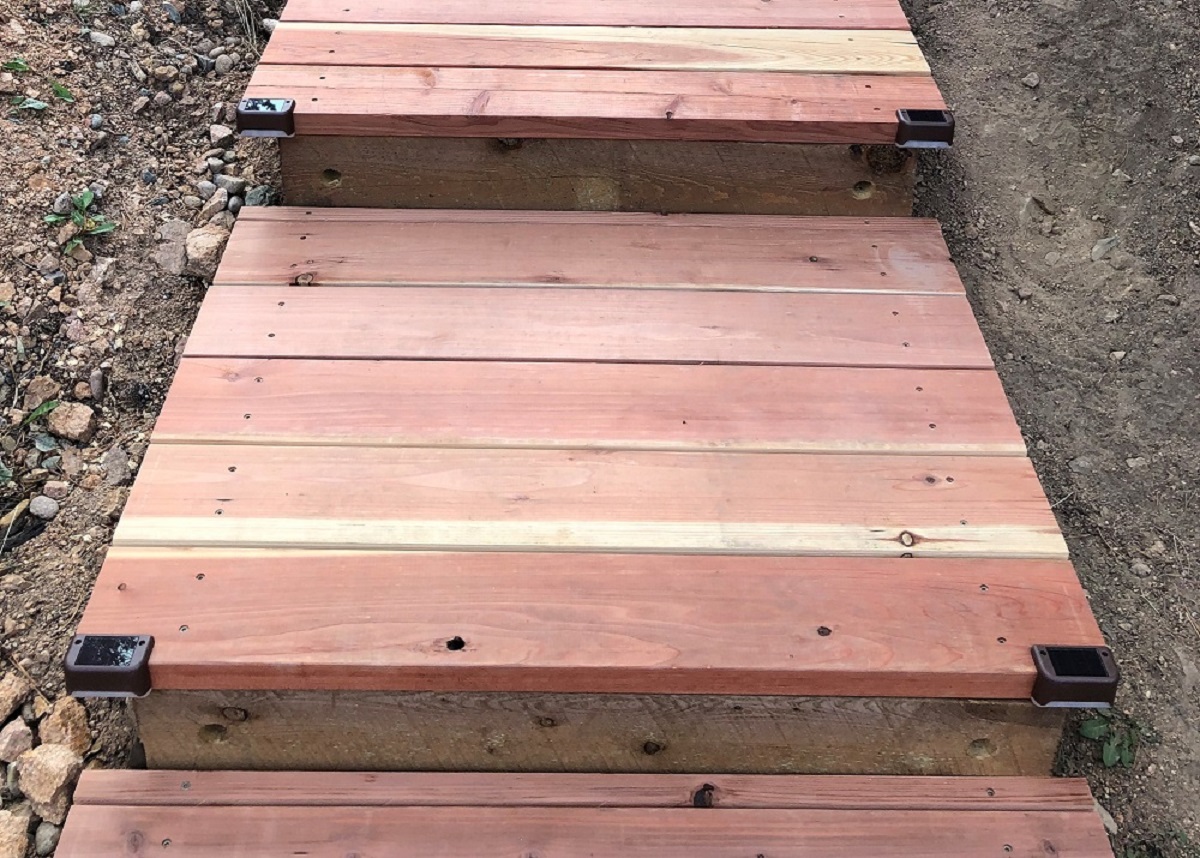
I cut and inserted final spacers at the back of each step and added solar powered LED lights. These lights are amazingly bright and can be installed on steps, rails, posts, and almost anywhere you wish to add some light.
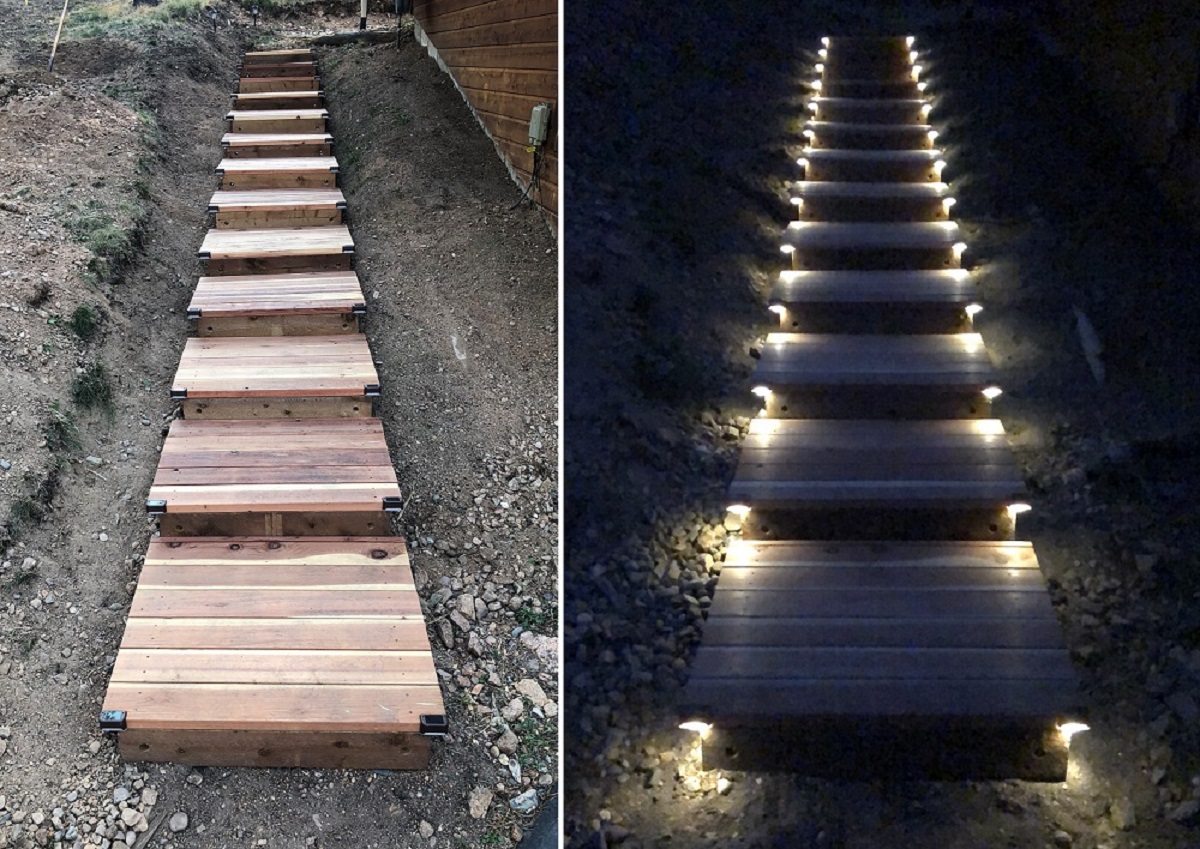
The result. All that’s left now is the cleanup and landscaping.
For lumber, hardware, LED lights, and miscellaneous tools, this project cost approximately $1300. Here’s the breakdown on supplies and tools I had to buy for this project:
- 17 – 6” x 6” x 8’ treated landscape timbers @ $23 each
- 25 – 2” x 6” x 12’ redwood @ $21.58 each
- 76 – 3/8” x 7” lag screws and washers @ $1.42 for each bolt and washer pair
- Decking screws, 5 lb. box @ $29.97
- 20 – 1/2” x 18” rebar stakes @ $1.79
- PORTER-CABLE 20V MAX Cordless Drill / Driver Kit, 1/2-Inch (PCCK607LB) (I burned up my Craftsman drill, so bought a 1/2” chuck drill with higher torque)
- 2 – DenicMic Solar Deck Lights 16 Pack for Stairs Step and Pathway, Weatherproof LED Deck Lights Solar Powered Outdoor Lights (Warm White)
- Irwin Speedbor Spade Wood Drill Bit 1/2″ X 6″ (88808) @ $7.37
- Brufer 23235 1/2-inch x 8-inch Auger Drill Bit @ $11.49
- Speed Square @ $4.98
- Stanley 48” level @ $23.52
Stay tuned for more DIY projects for ideas and inspiration for your home.
I have a similar project in mind and love what you’ve done here. Can you tell me how long the whole thing took so I can multiply that by three or four to take my limited skills into consideration 🙂
Charles, This project took me a good two to two and a half months working on it in my spare time. Part of the reason it took so long was because of the gas, cable, electric, and french drains running through the area, and so I had to do all the excavation by hand to avoid damaging any of these. Once I got the base step set, however, I got some momentum and was able to shovel dirt from uphill into the step frames to backfill as I moved up the slope.
Best,
Chad